Tips and Recipes
Italian Style Homemade Chicken Soup (52 New Foods, Around the World Week 10) March 10 2013, 15 Comments
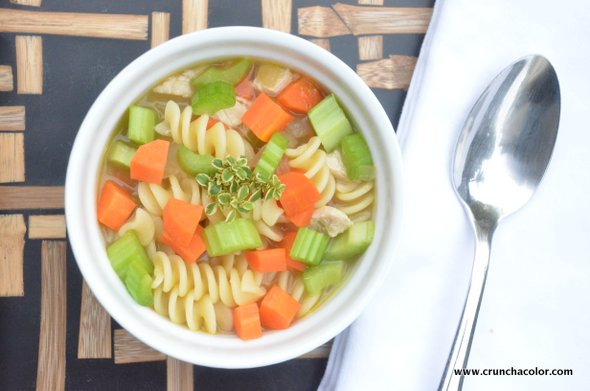
The easiest homemade chicken soup ever!
My littlest one was home
sick this week. When those rosy red cheeks and tired eyes show up, chicken soup
is first on the menu. It used to be that I would reach for a can of chicken
soup from the pantry, but we’ve come so far in our 52 New Foods journey that
when I grabbed that little red can this week I just couldn’t do a heat and eat.
“I need to make it from scratch.” I resolved. My husband, the sweetheart that
he is, headed out to the market at the crack of dawn with a simple list –
carrots, celery, and an onion. I had some leftover Italian chicken in the
fridge from dinner the previous night.
The beautiful thing about this recipe is that it is so darn easy to make and it results in a delicious, wholesome soup full of healthy ingredients. My son asked, “Why does chicken soup help to make me feel better when I am sick?” This question is one I’ve asked myself many times over. “I’m not sure,” I replied, “why do you think it helps?” His little hands wrapped around the bowl, sipping slowly he pondered this question and then responded, “Maybe the vegetables chase the bugs away.” I smiled a big smile and hugged him tight, “You know, I think you may be right. I’m glad that you’re feeling better.”
What we Liked: This easy Italian style homemade chicken soup isn’t just for chasing cold bugs away. It’s the perfect busy weeknight meal. Make our easy Italian chicken and save a few pieces as leftovers. Then use that tasty chicken to make this soup the next day. Serve it up with a gooey grilled cheese sandwich for a quick dinner, or pack it in the kids’ lunchboxes with a few whole grain crackers for crumbling.
Italian Style Homemade Chicken Soup
Prep time: 5 minutes
Cook time: 15 minutes
Yield: Makes 6 to 8 servings
Crunch a Color points: 10 protein, 10 healthy grains, 10 green or orange
For a printable version of this recipe click here.
Ingredients:

4 cups organic chicken
broth
2 cups cooked Italian chicken
2 cups cooked pasta (I like to use rotini)
1 cup water
3 celery stalks
2 carrots
½ onion
1 clove garlic
1 Tbsp olive oil
1 bay leaf
A few sprigs of fresh thyme
Salt and pepper to taste
Directions:
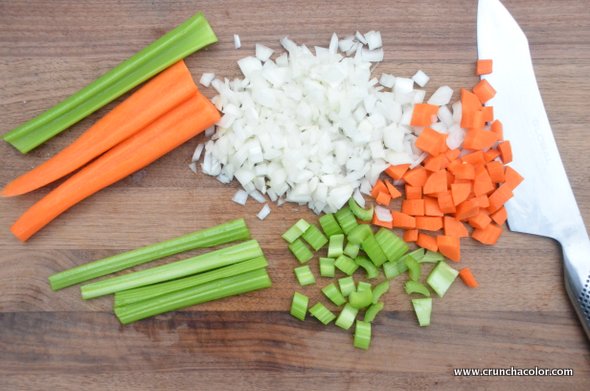
1. Chop the onion, carrots and celery into ¼” to ½” size pieces.
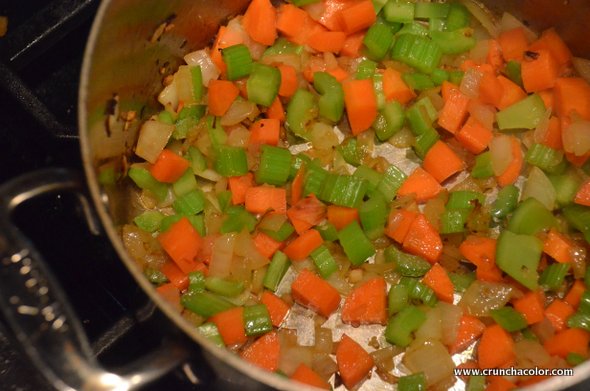
2. Heat a stockpot over
medium, then add the olive oil, garlic and onions. Simmer gently until the
onions are translucent, about 3 minutes. Add the carrots and celery and simmer
2 to 3 minutes more.
3. Add the chicken broth,
water and the bay leaf. Bring to a boil, then reduce heat and simmer for 8
minutes.

4. While the broth is
simmering, chop the chicken into bite size pieces. Add to the pot with the
cooked pasta and heat 2 minutes more.
5. Season to taste with salt and pepper. Serve warm with a few sprigs of fresh thyme.
*
Do you have a favorite homemade chicken soup recipe? Share your ideas!
Craving more easy recipes to try? Catch up on last week’s new food: Mini Asparagus Frittata aka Savory Muffins
About the author: Jennifer Tyler Lee is a mom of two children and the creator of Crunch a Color® -- award-winning nutrition games that make healthy eating fun. Like most parents, she struggled to get her kids to eat healthy, balanced meals, so she decided to make it into a healthy eating game and she’s giving back to support non-profit kids’ nutrition programs. Winner of the Dr. Toy and Parent Tested, Parent Approved awards, Crunch a Color® has been featured by Jamie Oliver’s Food Revolution, Rachael Ray's Yum-O!, Laurie David’s Family Dinner, Kiwi Magazine, Dr. Greene, and Yum Food & Fun For Kids, among many others, as a simple, fun and playful way to get kids to eat healthy and try new foods. Jennifer’s passion is making mealtime fun and healthy for busy families. Her easy recipes, quick tips, and new food adventures are regularly featured at Pottery Barn Kids, Jamie Oliver’s Food Revolution, The Huffington Post, and on her weekly recipe blog at crunchacolor.com.
Mini Baked Asparagus Frittata aka Savory Muffins (52 New Foods, Around the World Week 9) March 04 2013, 6 Comments
 Savory muffins are a fun twist on asparagus frittata! Baked with asparagus, onions and eggs, this
deliciously easy asparagus frittata recipe was a huge hit with my family. Bonus that it makes an easy addition to a healthy lunchbox!
Savory muffins are a fun twist on asparagus frittata! Baked with asparagus, onions and eggs, this
deliciously easy asparagus frittata recipe was a huge hit with my family. Bonus that it makes an easy addition to a healthy lunchbox!

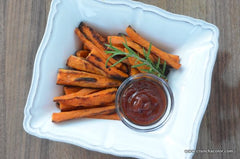
Crispy Oven Baked Sweet Potato Fries (52 New Foods, Around the World Week 8) February 24 2013, 22 Comments
 How to make
sweet potato fries so crispy and tasty they’re worthy of a French bistro. Tossed in olive oil with a little salt,
these baked sweet potato fries are tasty, easy and nutritious.
How to make
sweet potato fries so crispy and tasty they’re worthy of a French bistro. Tossed in olive oil with a little salt,
these baked sweet potato fries are tasty, easy and nutritious.
 How to make
sweet potato fries so crispy and tasty they’re worthy of a French bistro.
How to make
sweet potato fries so crispy and tasty they’re worthy of a French bistro. An Easy Apple Pie Recipe: Simple Apple Galette (52 New Foods, Around the World Week 7) February 17 2013, 4 Comments

This easy apple pie recipe is a simple French twist on a favorite sweet treat: apple galette.
My French Food Flop (52 New Foods, Around the World Week 6) February 12 2013, 5 Comments

Resiliency is the parenting manifesto du jour. But as a busy parent, being resilient (especially in the kitchen) is something I find hard to do
A Healthy Leek Soup Recipe (52 New Foods, Around the World Week 6) February 12 2013, 14 Comments
A healthy leek soup recipe that your kids will love (but not mine)!
52 New Foods: Our Journey to Happy, Healthy Eating February 10 2013, 4 Comments
52 weeks, 52 new foods. How our family discovered the secret to happy, healthy eating.
A Healthy, Easy Crepe Recipe (52 New Foods, Around the World Week 5) February 06 2013, 1 Comment
 A little taste of Paris, this easy crepe recipe is a
warm and wholesome treat. Healthy and delicious!
A little taste of Paris, this easy crepe recipe is a
warm and wholesome treat. Healthy and delicious!
 A little taste of Paris, this easy crepe recipe is a
warm and wholesome treat. Healthy and delicious!
A little taste of Paris, this easy crepe recipe is a
warm and wholesome treat. Healthy and delicious!A Simple Bok Choy Recipe (52 New Foods, Around the World Week 4) January 26 2013, 12 Comments
 Our simple, sizzling bok choy recipe with a hint of garlic and ginger
makes a super side for a healthy supper.
Our simple, sizzling bok choy recipe with a hint of garlic and ginger
makes a super side for a healthy supper.
 Our simple, sizzling bok choy recipe with a hint of garlic and ginger
makes a super side for a healthy supper.
Our simple, sizzling bok choy recipe with a hint of garlic and ginger
makes a super side for a healthy supper.Easy Orange Granita Recipe (52 New Foods, Around the World Week 3) January 18 2013, 5 Comments
 This easy orange granita recipe was a deliciously fun
project for my kids and me! A simple twist on a favorite fruit: Satsuma
Mandarin Oranges.
This easy orange granita recipe was a deliciously fun
project for my kids and me! A simple twist on a favorite fruit: Satsuma
Mandarin Oranges.
 This easy orange granita recipe was a deliciously fun
project for my kids and me! A simple twist on a favorite fruit: Satsuma
Mandarin Oranges.
This easy orange granita recipe was a deliciously fun
project for my kids and me! A simple twist on a favorite fruit: Satsuma
Mandarin Oranges. Sesame Green Bean Salad (52 New Foods, Around the World Week 2) January 12 2013, 2 Comments
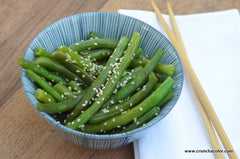 A simple sesame green bean salad adds a new twist to
an old favorite and makes supper super fun!
A simple sesame green bean salad adds a new twist to
an old favorite and makes supper super fun!
 A simple sesame green bean salad adds a new twist to
an old favorite and makes supper super fun!
A simple sesame green bean salad adds a new twist to
an old favorite and makes supper super fun!Easy Asian Pear Sauce (52 New Foods, Around the World Week 1) January 07 2013, 7 Comments
 Pear sauce made with crisp Asian pears and a hint of
ginger is an easy and fun twist on homemade applesauce.
Pear sauce made with crisp Asian pears and a hint of
ginger is an easy and fun twist on homemade applesauce.
 Pear sauce made with crisp Asian pears and a hint of
ginger is an easy and fun twist on homemade applesauce.
Pear sauce made with crisp Asian pears and a hint of
ginger is an easy and fun twist on homemade applesauce. One New Healthy Food a Week (52 New Foods) January 04 2013, 3 Comments

52 weeks, 52 new foods. This simple challenge planted the seeds of change at our family table. Pick a new healthy food to try each week and join the adventure!
Best Healthy Recipes of 2012 (52 New Foods) January 03 2013, 5 Comments
 The best healthy recipes of 2012 as voted by the toughest food critics at the
table!
The best healthy recipes of 2012 as voted by the toughest food critics at the
table!
 The best healthy recipes of 2012 as voted by the toughest food critics at the
table!
The best healthy recipes of 2012 as voted by the toughest food critics at the
table!Kumquat Jam (Week 51, 52 New Foods) December 31 2012, 92 Comments
 Kumquat jam adds a simple splash of citrus to savory
dishes: a burst of sunshine to start the New Year!
Kumquat jam adds a simple splash of citrus to savory
dishes: a burst of sunshine to start the New Year!
 Kumquat jam adds a simple splash of citrus to savory
dishes: a burst of sunshine to start the New Year!
Kumquat jam adds a simple splash of citrus to savory
dishes: a burst of sunshine to start the New Year!Cranberry Pomegranate Sauce (Week 50, 52 New Foods) December 19 2012, 4 Comments
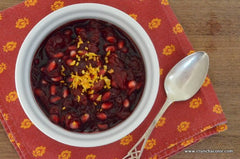 Cranberry pomegranate sauce is a playful twist on a
familiar favorite: an easy way to welcome a new food to your holiday table!
Cranberry pomegranate sauce is a playful twist on a
familiar favorite: an easy way to welcome a new food to your holiday table!
 Cranberry pomegranate sauce is a playful twist on a
familiar favorite: an easy way to welcome a new food to your holiday table!
Cranberry pomegranate sauce is a playful twist on a
familiar favorite: an easy way to welcome a new food to your holiday table!Pomegranate Seeds With No Mess! December 19 2012, 13 Comments
 A quick tip for how to seed a pomegranate the easy and fun way,
with no mess!
A quick tip for how to seed a pomegranate the easy and fun way,
with no mess!
 A quick tip for how to seed a pomegranate the easy and fun way,
with no mess!
A quick tip for how to seed a pomegranate the easy and fun way,
with no mess!Broiled Grapefruit Recipe (Week 49, 52 New Foods) December 17 2012, 6 Comments
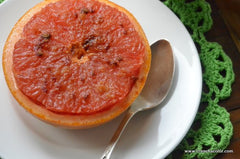 This deliciously simple broiled grapefruit recipe
adds a flavorful twist to your table: a sweet and juicy treat without a drop of
refined sugar.
This deliciously simple broiled grapefruit recipe
adds a flavorful twist to your table: a sweet and juicy treat without a drop of
refined sugar.
 This deliciously simple broiled grapefruit recipe
adds a flavorful twist to your table: a sweet and juicy treat without a drop of
refined sugar.
This deliciously simple broiled grapefruit recipe
adds a flavorful twist to your table: a sweet and juicy treat without a drop of
refined sugar. Mini Apple Pear Crisp (Week 48, 52 New Foods) December 10 2012, 7 Comments
 A mini apple pear crisp is the fresh food version of a big
warm bear hug! It's filled to the brim with sweet, bubbling fresh pears, apples and
cranberries -- the perfect treat to serve at a cozy winter get-together.
A mini apple pear crisp is the fresh food version of a big
warm bear hug! It's filled to the brim with sweet, bubbling fresh pears, apples and
cranberries -- the perfect treat to serve at a cozy winter get-together.
 A mini apple pear crisp is the fresh food version of a big
warm bear hug! It's filled to the brim with sweet, bubbling fresh pears, apples and
cranberries -- the perfect treat to serve at a cozy winter get-together.
A mini apple pear crisp is the fresh food version of a big
warm bear hug! It's filled to the brim with sweet, bubbling fresh pears, apples and
cranberries -- the perfect treat to serve at a cozy winter get-together. Sanity Saver: Make a Meal Plan {Giveaway} December 06 2012, 3 Comments
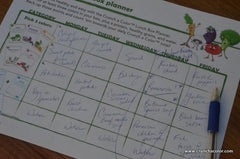 You’re an on-the-go mom, constantly juggling a
dizzying array of activities for your family. Working healthy meals into that
frantic schedule can be a challenge. The solution: make a meal plan.
You’re an on-the-go mom, constantly juggling a
dizzying array of activities for your family. Working healthy meals into that
frantic schedule can be a challenge. The solution: make a meal plan.
 You’re an on-the-go mom, constantly juggling a
dizzying array of activities for your family. Working healthy meals into that
frantic schedule can be a challenge. The solution: make a meal plan.
You’re an on-the-go mom, constantly juggling a
dizzying array of activities for your family. Working healthy meals into that
frantic schedule can be a challenge. The solution: make a meal plan.Romanesco: Broccoli with a Twist (Week 47, 52 New Foods) December 05 2012, 11 Comments
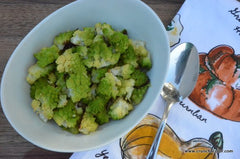 Romanesco was a new discovery for my kids and me this
week! This spiraling spectacle looks like a cross between broccoli and
cauliflower, and made a deliciously fun addition to our family table.
Romanesco was a new discovery for my kids and me this
week! This spiraling spectacle looks like a cross between broccoli and
cauliflower, and made a deliciously fun addition to our family table.
 Romanesco was a new discovery for my kids and me this
week! This spiraling spectacle looks like a cross between broccoli and
cauliflower, and made a deliciously fun addition to our family table.
Romanesco was a new discovery for my kids and me this
week! This spiraling spectacle looks like a cross between broccoli and
cauliflower, and made a deliciously fun addition to our family table.Veggie Pancakes (Week 46, 52 New Foods) November 28 2012, 5 Comments
 Veggie pancakes? You bet! Carrot and zucchini come together to make a tasty,
easy veggie pancake perfect for brunch or to munch at lunch!
Veggie pancakes? You bet! Carrot and zucchini come together to make a tasty,
easy veggie pancake perfect for brunch or to munch at lunch!
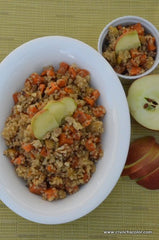 This easy
recipe for gluten-free stuffing made with quinoa, apples, sweet potato and
walnuts is the ticket for a healthy twist on a holiday favorite.
This easy
recipe for gluten-free stuffing made with quinoa, apples, sweet potato and
walnuts is the ticket for a healthy twist on a holiday favorite. Instead of waiting until the
holidays to show thanks, this simple Thanksgiving activity makes it easy and fun to share appreciations for the little things every day.
Instead of waiting until the
holidays to show thanks, this simple Thanksgiving activity makes it easy and fun to share appreciations for the little things every day.